Rhinestones and crystals are having a moment this season, so it’s the right time to add some bling to your accessory collection. If you prefer making your own to shopping at Claire’s (and who doesn’t, really), take a look at this DIY statement bracelet tutorial from Jenni from ISpy-DIY.
This post may contain affiliate links*DIY Statement Bracelet: Supplies

You need: Gold and silver chain from M&J Trimming, Rhinestone, Black Suede rope, pliers, bracelet closure.
DIY Statement Bracelet: How-to
1. Tie two pieces of chain together.
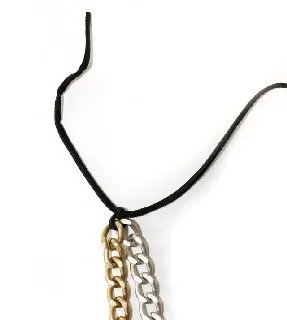
Tie together the two pieces of chain with a double knot. Your two chains should be the same size links so they match up when you are weaving rope.
2. Weave together first links of chains.
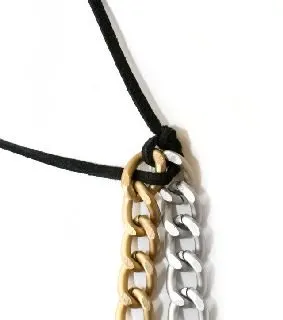
Start by weaving together the first link of the chains.
3. Add in rhinestones.
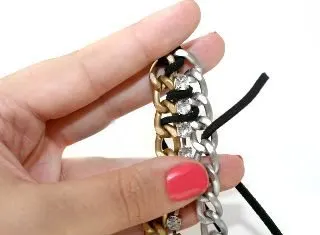
Place the rhinestones in between the two pieces of chain and begin weaving all three.
4. Continue weaving.

Continue weaving down the chains, pulling the rope tightly between each link.
5. Remove extra links.
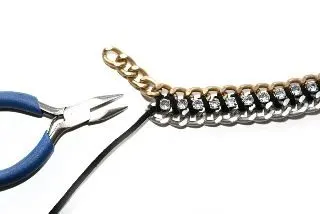
Using your pliers, remove any extra links so all three chains line up. Tie a double knot at the end.
6. Add closures.
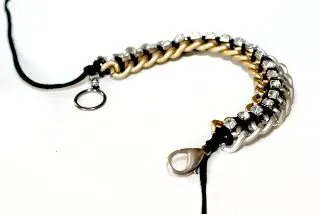
Tie the closures on each end. Trim excess rope.
7. Wear it!
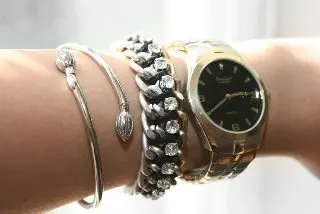
Fasten around your wrist and to create a great mixed metal look!
Office
Wednesday 13th of March 2013
I'm so glad I found this. Definitely will be designing some im the future for our displays. Thanks
TiniZine
Sunday 14th of August 2011
oh wow! this is really great! i wanna try this out myself. just gotta think about where i can get those supplies :-/
Delia McManus
Saturday 13th of August 2011
I'm so gonna do this, looks really HOT. Thanks for the tip. Please check out my website and let me know how I can improve it. Your girl-Delia
Kim
Friday 12th of August 2011
Love that!